In a world full of uncertainties, having the knowledge and skills to build a survival shelter from scratch can be invaluable. Whether you’re exploring the great outdoors or preparing for the worst, being able to create a shelter that will provide protection and security is essential. This step-by-step guide will take you through the process, from finding the right location to gathering materials and constructing a sturdy shelter. With these practical tips, you can gain the confidence to face unexpected situations head-on and emerge stronger. Let’s dive into the world of survival shelter building together!
Step 1: Assess your surroundings
Size up the area
When building a survival shelter, the first step is to assess your surroundings and size up the area. Take a moment to carefully observe your surroundings and identify a suitable location for your shelter. Look for an open space with enough room to comfortably accommodate the shelter.
Consider environmental factors
Consider the environmental factors that could affect the construction and durability of your shelter. Take note of the prevailing wind direction, as you will want to position your shelter in such a way that it provides maximum protection from wind and cold air. Additionally, consider the presence of water sources, such as rivers or lakes, and avoid building your shelter too close to them to avoid potential flooding risks.
Identify potential hazards
Before constructing your shelter, it is important to identify and assess potential hazards in the area. Look out for any steep slopes, loose rocks, or unstable trees that could pose a risk to your safety. Check the ground for signs of animal activity, such as tracks or droppings, as this may indicate the presence of potentially dangerous wildlife. It is crucial to choose a location that minimizes exposure to these hazards.
Step 2: Choose the right location
Look for high ground
When selecting a location for your survival shelter, prioritize high ground whenever possible. Building your shelter on higher ground helps to minimize the risk of flooding and ensures better drainage during rain. High ground also provides a vantage point, allowing you to better survey your surroundings and potentially spot any signs of danger or rescue.
Find natural shelter features
Utilize natural shelter features in your chosen location to maximize the effectiveness of your survival shelter. Look for natural formations such as large rocks, caves, or overhanging tree branches that can provide additional protection and insulation. These natural features can serve as a solid foundation for your shelter and help enhance its structural integrity.
Avoid flood-prone areas
When building a survival shelter, it is important to avoid flood-prone areas. Look for locations that are elevated and not susceptible to flooding, especially during heavy rain or storms. Building in a flood-prone area can jeopardize your safety and make the shelter ineffective in providing protection from the elements.
Step 3: Gather materials
Search for sturdy branches and logs
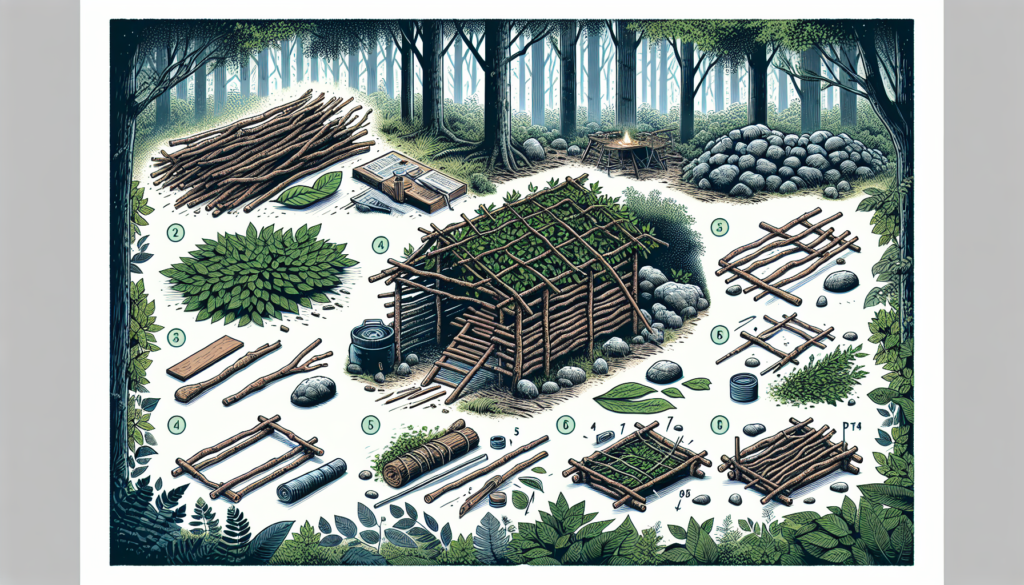
To build a sturdy survival shelter, you will need to gather appropriate building materials. Look for sturdy branches and logs that can serve as the framework of your shelter. Choose materials that are strong and durable, as they will provide the necessary support and stability for your shelter. Avoid using rotten or weak branches, as they may compromise the integrity of the structure.
Collect leaves, foliage, and vines
Collecting leaves, foliage, and vines is essential for creating insulation and improving the comfort of your shelter. These materials can be used to line the walls and roof of your shelter, helping to regulate temperature and provide added protection against the elements. Make sure to gather these materials in abundance to ensure sufficient insulation and coverage.

Find rocks or boulders for stability
Incorporating rocks or boulders in your shelter construction can enhance stability and prevent shifting or collapsing. Look for large rocks that can be used as anchors for the base or as additional support for the structure. These rocks will help to secure the shelter in place and provide a reliable foundation.
Step 4: Clear the site
Remove debris and vegetation
Before constructing your shelter, it is crucial to clear the site of any debris and vegetation. Remove any fallen branches, leaves, or other obstructions that may hinder the construction process. Clearing the site not only ensures a clean and smooth surface to work with but also minimizes potential hazards and reduces the risk of pests or unwanted visitors in your shelter.
Level the ground
Leveling the ground is an important step to ensure stability and structural integrity. Use a shovel or other tools to flatten the ground and remove any uneven surfaces. This will help create a solid base for your shelter and prevent any tilting or instability. Take your time to thoroughly level the ground to ensure the best possible foundation for your shelter.
Create a smooth surface
After clearing the site and leveling the ground, it is essential to create a smooth surface for your shelter. Smooth out any remaining bumps or lumps in the ground to provide a comfortable and stable foundation. A smooth surface will also make it easier to construct and secure the framework of your shelter.
Step 5: Construct the framework
Build a sturdy base
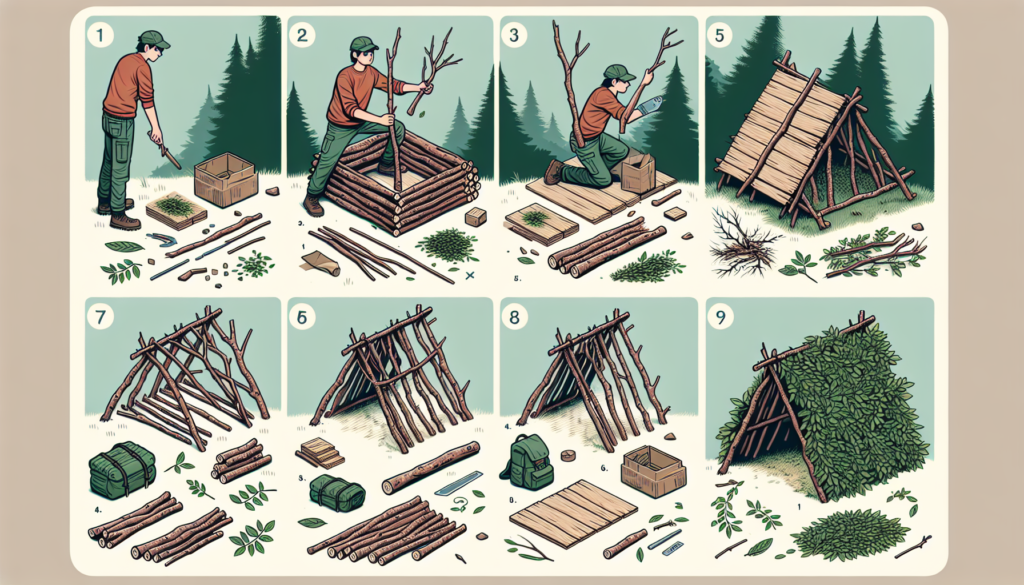
Start by building a sturdy base for your survival shelter. Lay down the largest and strongest branches or logs as the foundation, creating a grid-like pattern. This will form the base of your shelter and provide the necessary support. Ensure that the branches or logs are securely placed to prevent shifting or collapsing.
Create the support structure
Once you have established the base, begin creating the support structure for your shelter. Use smaller branches or logs to form the walls, placing them vertically and securing them to the base. Leave gaps or openings in the structure for ventilation and ease of access. Be mindful of the structural integrity and ensure that the support structure is tightly constructed.
Consider different design options
When constructing your survival shelter, consider different design options that best suit your needs and the available materials. You can opt for a lean-to design, which uses a single slanted roof supported by one side of the shelter. Alternatively, you can explore a teepee-style design that utilizes a cone-shaped structure supported by multiple poles. Choose a design that is feasible based on your skills, available materials, and the intended purpose of the shelter.
Step 6: Add insulation
Use natural materials for insulation
To enhance the insulation properties of your survival shelter, utilize natural materials such as leaves, foliage, and even animal fur if available. Line the walls and roof of your shelter with these materials, creating a thick layer that helps to retain heat and regulate temperature. Natural insulation materials can significantly improve the comfort and effectiveness of your shelter.

Create multiple layers
Adding multiple layers of insulation can further enhance the effectiveness of your shelter. Layer leaves, foliage, or other insulation materials inside the shelter walls to create a thicker barrier against the elements. The more layers you add, the better the insulation, providing increased warmth and protection.
Pay attention to ventilation
While insulation is crucial for warmth, it is equally important to pay attention to ventilation. Adequate ventilation helps prevent the buildup of moisture and condensation inside the shelter, which can lead to discomfort and even health issues. Leave gaps or openings in your shelter structure to allow for natural airflow.
Step 7: Cover the shelter
Use branches, leaves, or tarps
Covering your survival shelter is essential to provide protection from rain, wind, and other elements. Use branches, leaves, or even tarps to create a waterproof and wind-resistant cover for your shelter. Secure the cover tightly to prevent it from being blown off or compromised by strong winds.
Secure the cover tightly
Properly securing the cover of your shelter is essential to ensure its effectiveness. Secure the branches, leaves, or tarps firmly to the framework of the shelter, using knots or makeshift fasteners. Pay attention to the corners and edges, as these areas are more susceptible to wind gusts or water infiltration.
Consider waterproofing techniques
To maximize the waterproofing ability of your shelter cover, consider applying additional waterproofing techniques. Use natural materials such as resin or sap to seal any gaps or seams in the cover. This will help to prevent water from seeping through and keep the interior of your shelter dry and comfortable.
Step 8: Create a door and access points
Cut an opening for a door
creating a door is essential to provide easy access to your survival shelter. Cut an opening in one of the walls or at the front of your shelter, making sure it is large enough for you to enter and exit comfortably. Consider the wind direction and position the door in a way that minimizes the exposure to harsh weather conditions.
Build additional entrances if needed
Depending on the size and purpose of your survival shelter, you may need to build additional entrances. Multiple entrances provide alternative access points and allow for efficient movement in and out of the shelter. Consider the layout and design of your shelter to determine if additional entrances are necessary.
Ensure accessibility and security
When creating the door and access points, ensure that they are easily accessible and provide proper security. Make sure the door is wide enough for you to comfortably pass through with any necessary equipment or supplies. If needed, construct simple barriers or makeshift locks to ensure the security and privacy of your shelter.
Step 9: Make the shelter comfortable
Add bedding or insulation on the ground
To make your survival shelter more comfortable, add bedding or insulation on the ground. Collect leaves, foliage, or other soft materials to create a thick layer of padding. This will help to insulate the ground, providing additional warmth and cushioning for a comfortable sleeping or resting surface.
Create seating or storage areas
Utilize the available space within your survival shelter to create seating or storage areas. Use rocks or logs as makeshift benches or stools for seating. Set up designated areas for storing essential supplies and equipment, keeping them organized and easily accessible. Creating functional spaces within the shelter will improve comfort and efficiency.
Consider decorative touches for morale
While not essential for survival, adding decorative touches to your shelter can boost morale and create a more pleasant living environment. Collect flowers, leaves, or other natural elements and use them to create simple decorations. These small touches can help uplift spirits and create a sense of homeliness in an otherwise challenging situation.
Step 10: Test the stability and safety
Check the structure for stability
Once your survival shelter is complete, it is important to test its stability. Give the structure a gentle shake to ensure that it is securely built and does not wobble or collapse. Check the anchoring points, walls, and roof to ensure they are properly secured and can withstand moderate pressure or wind.
Inspect for potential hazards
Conduct a thorough inspection of your survival shelter for any potential hazards. Look for sharp edges, protruding branches, or any other elements that could cause injury or discomfort. Remove or modify any hazards to ensure the safety of occupants and prevent accidents.
Make any necessary adjustments
After testing the stability and inspecting for hazards, make any necessary adjustments or improvements to your survival shelter. Reinforce weak spots, tighten any loose connections, or add additional support where needed. It is important to address any issues promptly to ensure the longevity and effectiveness of your shelter.
Building a survival shelter from scratch requires careful planning, resourcefulness, and attention to detail. By following these steps, you can create a safe and comfortable haven in challenging situations. Remember to always prioritize safety, adapt to the available resources, and continuously assess and improve the shelter as needed. With the ability to construct a survival shelter, you gain an essential tool in your arsenal of survival skills, enabling you to face emergencies head-on and emerge stronger and more resilient.

